Showing posts with label - Difficulty 2/5. Show all posts

Sunday, 14 November 2010

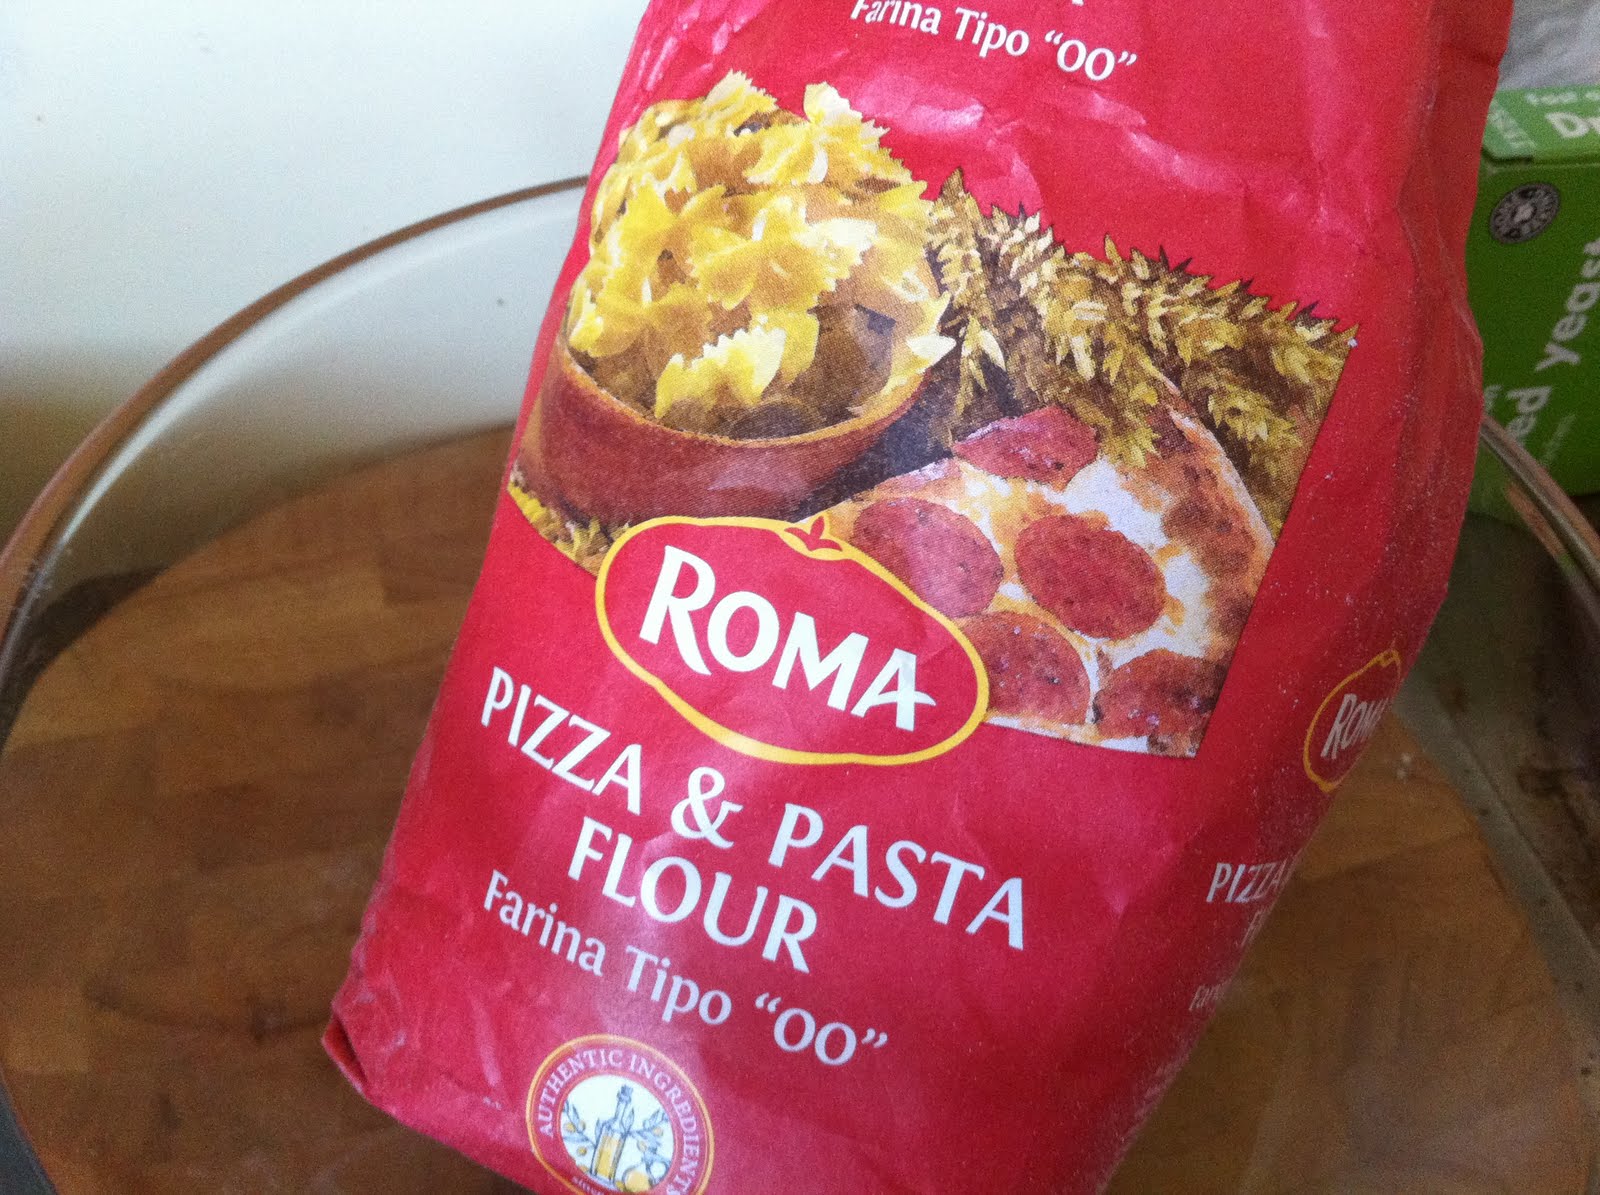
Roma Pizza/Pasta Flour


I love me some pizza.... let's face it, if you don't there's something wrong with you! At least that's what I say about my husband eating his cheeseless pizza because he hates cheese, or at least he thinks he does.

I was excited to get an email from Roma offering me some of their lovely pizza/pasta flour to try out along with a few recipes. I'm glad I said yes, not only cos it meant I got to enjoy more pizza but also because they provided me with my new favourite dough recipe! This is a fantastic dough to work with, really easy to make and deliciously tasty. It's become my new standard recipe (sorry Jamie!)

Roma Pizza Dough

Makes 2 8/9" round pizzas

Ingredients

250g Roma Strong Pizza/Pasta Flour
1/2 tsp salt
150ml lukewarm water
3.5 g fast action yeast
1 tsp EVOO
1/2 tsp caster sugar

Recipe
1. Mix the water, yeast, EVOO and sugar together and set to the side until the mixture starts to froth.
2. Mix the roma pizza flour with the salt in a bowl with tall sides.
3. Make a hollow in the flour and pour in the yeast mixture. Mix the flour into the liquid. When fully combined, knead for 5 minutes. Cover the bowl with cling film (aka seran wrap) and place the bowl in a warm spot for an hour or until the dough has doubled in size.
4. Divide the dough in 2 and make 2 pizza bases on a floured surface. Add your favourite toppings and bake in the oven at 170˚C for 8-10 minutes.


Thank you to the good and lovely people at Roma for the free flour and the fantastic recipes!

Wednesday, 3 November 2010

Christmas Pudding

It's hard to ignore that Christmas is on it's way now with shops having had Christmassy things in stock since September, and while I do think it's crazy to be thinking about Christmas THAT soon, it is important to get a move on with preparing some Christmas goodies ahead of time.

Last Christmas I watched Delia's Christmas Special in which she made a lot of the traditional Christmas food, one being Christmas Pudding. I've never really liked Christmas Pudding (despite absolutely loving Christmas cake. In the show Delia said most people say they don't like it because they've only ever tried store bought, but that this recipe is the "proper" way to do it and much nicer. How could I resist? The Queen has spoken! And apparently she's been using this recipe every year for over 30 years herself, how could it be bad? So I gave it a go last year and was so glad I did, I'm excited to give this a go again this year, I may just be a pudding fan after all!

The reason I'm posting this so early? Because it's good for this pudding to mature for about a month before eating. So ignore that it's still November cos it ain't too early to get cooking and baking for Christmas.


Christmas Pudding

Serves 8-10

Ingredients

4 oz (110 g) shredded suet (beef or vegetarian)
2 oz (50 g) self-raising flour, sifted
4 oz (110 g) white breadcrumbs (made from a loaf left out overnight - the best way to make breadcrumbs is in a blender, if you have one)
1 level teaspoon ground mixed spice
¼ level teaspoon freshly grated nutmeg
good pinch ground cinnamon
8 oz (225 g) soft dark brown sugar
4 oz (110 g) sultanas
4 oz (110 g) raisins
10 oz (275 g) currants
1 oz (25 g) mixed candied peel, finely chopped (buy whole peel if possible, then chop it yourself)
1 oz (25 g) almonds, skinned and chopped (I left these out, not a bit fan of almonds)
1 small Bramley cooking apple (7 oz/200 g), peeled, cored and finely chopped
grated zest ½ large orange
grated zest ½ large lemon
2 tablespoons rum
2½ fl oz (75 ml) stout, plus a bit extra if needed
2½ fl oz (75 ml) barley wine I added in 2½ fl oz more of Stout instead
2 large eggs

Equipment
You will also need a 2 pint (1.2 litre) pudding basin, lightly greased.

Recipe
1. Get our your largest bowl, and I mean your most massivest bowl, and pour in the suet, flour, breadcrumbs, spices and sugar and mix well.
2. Gradually add in the dried fruit, mixed peel, almonds, apple, orange zest and lemon zest


3. In a separate smaller bowl measure out all the alcohol, add the eggs and beat together well
4. Pour the eggy alcohol over the other ingredients and mix thoroughly. It should be quite sloppy and fall off the spoon when tapped at the side of the bowl. (If you think it's too dry mix in a little more stout.
5. cover the bowl with a clean tea towel and leave for a couple of hours or overnight
6. Fill a saucepan with boiling water, place a steamer on top and bring the water to a simmer on the stove.
7. Pack the pudding mix into a greased basin, cover with 2 layers of baking paper then a sheet of tin foil, then tie with string to secure.
8. Steam your pudding for 8 hours, making sure to keep an eye on the water level, topping up with boiling water when needed.
9. When done, remove from the steamer and leave until it gets cold. Remove the baking paper and foil and wrap it all up with fresh paper, foil and string.
10. Store your pudding in a cool dry place, away from light for about a month
11. Come Christmas, start up the steamer again and get the pudding steaming for 2 hours.... delish!


Something else to consider getting ready now is Christmas Cake because it's better after a month maturing. I have two recipes for Christmas Cake here and here.

A few other Christmas recipes include:
Jamie's Mince Pies
Traditional Mince Pies
Ginger Glazed Gammon/Ham
Maple Glazed Gammon/Ham
Sage, Sausage and Apricot Stuffing
Christmas Roast veggies

Sunday, 22 August 2010

Tate & Lyle Sugar - Banana Bread


Banana Bread

Ingredients

145g caster sugar
1 egg
100g mashed banana
140g flour
1 tsp baking powder
1 tsp bicarbonate of soda
1 tsp ground ginger
1 tsp ground cinnamon
70g melted butter

Recipe
1. Preheat oven to 170˚C
2. Beat sugar and eggs together
3. Mix in the mashed banana
4. Mix in the dry ingredients, then stir in the butter.
5. Bake in the oven for 45 minutes.

Thanks to Tate & Lyle for the fairtrade sugar used in this recipe. There's lots of recipe ideas for each type of sugar on their website

Tuesday, 2 March 2010

Lemony cupcakes


It's been such a loooong winter here, which seems to have disappeared like a flick of a switch when we moved from February to March. I made these last week when I was longing for a little sunshine again and they did the trick. I love citrusy flavours for sunny days but I'll have to remember to enjoy citrusy things to encourage the sun to come back too now!

I've based this on a recipe here from Deeba at Passionate about Baking who got it from CoffeeGrounded who got it from the Martha Stewart website. So thanks Martha!

Lemony cupcakes

Makes about 12-18 cupcakes or 6-9 muffins

Ingredients

Cupcakes
100g unsalted butter (room temp)
1 1/2 cups all purpose flour
2 teaspoons baking powder
1/2 teaspoon salt
1/2 cup low-fat buttermilk (room temp)
1 teaspoon vanilla (I used the insides of a vanilla bean)
Zest of one lemon, finely grated, plus juice
1 cup granulated sugar

Icing
1 cup icing sugar
a drop of yellow food colouring
2-3 tbsp lemon juice
1 tbsp water

Recipe
1. Preheat your oven to 170˚C and prepare your bun/muffin cases on your baking tray.
2. In one bowl mix together the four, baking powder and salt. In another bowl whisk together the butermilk, vanilla, lemon juice and zest.
3. Beat the butter until smooth, then beat in the sugar.
4. Beat in the eggs one at a time
5. Mix in a third of the flour mix, then half the buttermilk mix, another third of the flour, the rest of the buttermilk and the last of the flour mix.
6. Divide the batter amongst the bun/muffin cases and bake for 20-25 minutes.
7. Leave to cool on a rack before frosting.


8. Mix together the icing sugar and food colouring , then gradually beat in a little lemon juice at a time until all the sugar is mixed in and the mixture is thick (not too runny). Use to decorate your cupcakes.

Wednesday, 17 February 2010

Polo Shaped Rolo Cake


I love going through my rss reader and coming across a new recipe that makes me want to go make it immediately - this cake was one of them. Scottish food blogger, Jacqueline, of Tinned tomatoes fame posted this recipe for rolo cake topped with gooey snowballs who found it on The Caked Crusader's blog. I knew I had all the ingredients in my kitchen so it seemed to be my destiny to make this one.

I had recently bought a new bundt tin and decided immediately to use it for this one thus resulting in polo shaped rolo cake! Really tasty cake with the occasional surprise of crispy chewy caramel throughout. This is one you should bookmark and try out.


Rolo Cake

Ingredients

Cake:
200g unsalted butter, at room temperature
1 1⁄3 cup caster sugar
4 large eggs
1 ½ cup self raising flour
2⁄3 cup cocoa powder
100g Rolos, halved
Buttercream:
1 cup icing sugar
100g unsalted butter, at room temperature
½ tsp vanilla extract
2 tbsp cocoa powder

Recipe
1. Preheat the oven to 180°C
2. Grease a deep 20cm diameter bundt tin.
3. Cream together the butter and sugar until pale and fluffy, then mix in the eggs one at a time.
4. Gently stir in the flour and cocoa, before stirring in the chopped rolos.
5. Spoon into the prepared cake tin and bake for approximately 30-35 minutes or until a skewer comes out cleanly. The cake will settle on cooling but this is because it’s so rich and squidgy.
6. Leave to cool in the tin, on a wire rack.

Buttercream Frosting
1. When cool make the buttercream by creaming the butter until soft and smooth, then cream in the icing sugar a little at a time.
2. Beat in the vanilla extract and cocoa powder.
3. If the mix is a bit solid, add a dash of milk to soften and slacken.
4. Spread over the cake and decorate as required .


For another fun recipe using rolos check out these caramel filled chocolate cookies

Monday, 15 February 2010

Pancake Tuesday

In need of a pancake recipe for tomorrow? Try out either French Crepes


or a stack o American pancakes!


Or maybe you could use Nigella's pancake mix.... we love this one for it's convenience and ease of use

Instant Pancake Mix(From Nigella Express)
600g flour
3 tbsp baking powder
2 tsp bicarbonate of soda
1 tsp salt
40g vanilla/caster sugar

Recipe
Mix everything together and store in an airtight container

When you want some pancakes whisk together....
150g pancake mix, 1 egg, 250ml milk, t tsbp melted butter

Heat your pan with no oil, spoon batter onto pan to cook. When bubbles appear on the surface flip them over to cook until golden on each side.

Nigella makes 15 pancakes about 8cm in diameter from this mix, but we like nice big pancakes and get 6 or 7 big ones out of it.


Happy pancake day!

Saturday, 6 February 2010

Nutella Day... late

Yesterday was World Nutella Day..... I didn't get to make anything Nutella based but did today instead. A simple one, nutella and pancakes....


What do you like with your nutella?

Friday, 5 February 2010

Malteser Cheesecake


There's an amazing woman in my church who is one of the most amazing cooks I have ever met! She's an absolute star and cooks a nice hot lunch for about 20 of the older members of the church every other week and once went out of her way to make a special dinner for our youth group one Sunday.

She once made this cheesecake and when I asked for the recipe she confessed it was from a charity cookbook the local High School produced a few years ago. It turned out I had this cookbook!!!! Delicious cheesecake recipe was right under my nose and I didn't even know it!

This was so simple to make, had a fantastic thick biscuity base and lovely light fluffy cheesecakey goodness on top... not to mention the chocolatey maltesers!!!!!

Malteser Cheesecake


Ingredients

Biscuit Base
14 Digestive biscuits/Graham Crackers, crushed
1/3 cup butter, melted
Cheesecake mix
3oz (85g) icing sugar
8oz(225g) cream cheese
1/2 pint (230ml) whipping cream
135g bag of maltesers, crush most but hold a few over for decoration.

Recipe
1. Mix together the biscuits and butter until the mixture starts to stick together. If it is too dry add more melted butter. Press this mixture into the base of a 15cm cake tin. Put this in the fridge for half an hour while you work on the rest.
2. Whip the cream in a bowl until thick and put in the fridge.
3. Cream the icing sugar and cream cheese together and fold in the maltesers.
4. Take the cream out of the fridge and fold into the mixture.
5. Spread the cream cheese mix over the biscuit base and refrigerate until set.

Wednesday, 3 February 2010

Chocolate Bundt Pudding


We were at friends' house for dinner a few Saturdays ago and it's become a pattern for me to bring dessert to people's houses now when we're having meals... sometimes if we're not having meals! This time I had seen Patsy's blog post on a Choclate Bundt Cake recipe and was keen to try it, especially seeing as it was a "healthier" one. Plus who doesn't love chocolate cake? Well my husband but that's neither here nor there!

I halved the recipe below and used a smaller bundt tin and served it warm with warm chocolate ganache (recipe below too)

Chocolate Bundt Pudding

Ingredients

Non-stick cooking spray with flour
3 ounces dark chocolate, fiinely chopped
3/4 cup Dutch process cocoa
1 teaspoon instant espresso
1 cup boiling water
1 3/4 cups all-purpose flour
1 teaspoon salt
1 teaspoon baking soda
2 cups light brown sugar
1/2 cup canola oil
1 tablespoon vanilla extract

Recipe
1. Preheat oven to 180˚C. Spray the inside of you bundt pan with cooking spray in preparation.
2. Mix together the chocolate and boiling water in a bowl and cover. Set to the side for 5 minutes, then whisk until smooth.
3. In separate bowl, mix together the flour, salt and baking soda.
4. Using a mixer, mix the chocolate together with the sugar, oil and vanilla. Then gradually mix in the flour mixture until well combined and smooth.
5. Pour the batter into your oiled bundt tine and bake for 50 minutes, leave to cool a little but not completely.
6. Slice and serve with ganache

Ganache

Ingredients

170g dark chocolate
3/4 cup single cream

Recipe
1. Melt the chocolate in a small saucepan over a medium heat.
2. Stir in the cream until smooth.

Thursday, 7 January 2010

Sweet & Sour Chicken


I didn't think home made sweet and sour could be as good as what you get from the take aways, but this recipe was a success in our house, not only with me, but with my fussy hubby who'll only ever order sweet and sour chicken from the Chinese! This one's definitely going on the list of things to make again!

Rob gave me Tana Ramsay's 'Real Family Food' book for Christmas so one of the first things I did was to go through it with the post it tabs and bookmark everything I want to try out. Amongst those that were tabbed was her recipe for Chicken Skewers with Sweet and Sour Sauce. I've used this as a basis for this sweet and sour chicken dish and adapted a bit to make it more of a cantonese style dish instead of skewers with dip.

Sweet and Sour Chicken

Serves 2

Ingredients

2 skinless chicken breasts, cut into strips
Handful of chopped red pepper

Marinade
3 limes, juiced
2 tbsp soy sauce
1 tbsp sesame oil
1 tbsp honey
1 tbsp plain flour

Sauce
150ml water
2 tbsp sugar
3 tbsp rice vinegar
3 tbsp ketchup
1 tsp salt
Handful of pineapple pieces from a tin (with natural juices)
1 tbsp juice from tin of pineapple
2 tsp cornflour mixed in 2 tsp water


Recipe
1. Mix together the marinade ingredients then add the chicken strips. Leave to marinate for 2 hours or overnight.
2. Heat a little oil in a pan and add the chicken and pepper (do not add excess marinade) and cook through for 5-10 minutes stirring often.
3. Mix together the ingredients for the sauce (except the cornflour in water) and bring to the boil. Stir in the cornflour mix and simmer for a few minutes.
4. Stir sauce in with the chicken and peppers and serve immediately.

Wednesday, 6 January 2010

My Christmassy Terrine

Are you tired of Christmas dinner by now? If not you should give this a go, Even if you are what the heck, try it anyways.

I spotted a recipe in a magazine before Christmas (I think it was Sainsbury's own mag but not entirely sure) which I read and kept the idea in mind for during the Christmas period. The original recipe looked beautiful with dried apricots, nuts and cranberries all mixed in but I had to leave these out of my version of this recipe for husband to be able to enjoy it too.

This was rather tasty and really very easy to make but looks a bit more complicated and impressive - I love things like that!


Ruth's Christmassy Terrine

Serves 4

Ingredients

1 white onion, diced
2 cloves of garlic minced
1 tsbp olive oil
18 rashers of unsmoked streaky bacon
8 skinned and boned chicken thighs, diced into a mix of small and large pieces
150g pork mince
2 slices of bread, blended into breadcrumbs
1 tbsp brandy
1 tsp sage
2 tsp thyme
2 tsp lemon juice
salt
pepper

Recipe
1. Fry the onion and garlic in the olive oil until soft. Leave to cool for a bit.
2. Line a loaf tin with the streaky bacon, leaving a few to the side
3. Mix together the rest of the ingredients in a bowl then pour into the bacon lined tin.
4. Cover the top with the overhanging bacon and layering extra bacon over the top.
5. Cover over with tin foil and place in an oven dish. Part fill the dish with hot water and place into the oven at 180˚C for 1 hour.
6. Remove from the oven and carefully drain off any fat. Leave to cool.


This can be served hot or cold, if you want it hot place a few slices in the oven at 180˚C for 5-10 minutes
Great served with some roast root veggies, potatoes and cranberry sauce.

Monday, 28 December 2009

Daring Bakers 21: Gingerbread House

I'm late..... again.... with my Daring Bakers post for this month, but I only just got it finished. This month the challenge was a Christmassy one in that we had to make a Gingerbread House!

I have to admit I had a few problems with this one. There were two different recipes to work from for this, I thought I'd save reading any further and just do the first one, but ended in disaster for me because the dough ended up way too dry and I still had more flour to add! I asked my fellow DBers for advice and was told to add a little milk or water until it comes together so I gave it a go but it just didn't want to mix, I ended up with firm clumps swimming in milk, so that was off to the bin. I read on and tried out the second recipe which worked much better this time, but did need extra water to bring it together too, but not much and I think it turned out well in the end.....


... I'm rather proud of my little piece of architecture, but to be honest not sure a Wicked Witch would feel safe living in it.

PS I halved this recipe to make a smaller house, I also only used half the dough on the house and made gingerbread "cookies" with the rest.

Scandinavian Gingerbread (Pepparkakstuga)

Recipe


from The Great Scandinavian Baking Book by Beatrice Ojakangas

1 cup butter, room temperature [226g]
1 cup brown sugar, well packed [220g]
2 tablespoons cinnamon
4 teaspoons ground ginger
3 teaspoons ground cloves
2 teaspoons baking soda
½ cup boiling water
5 cups all-purpose flour [875g]

1. In a large bowl, cream the butter and sugar until blended. Add the cinnamon, ginger and cloves. Mix the baking soda with the boiling water and add to the dough along with the flour. Mix to make a stiff dough. If necessary add more water, a tablespoon at a time. Chill 2 hours or overnight.

2. Cut patterns for the house, making patterns for the roof, front walls, gabled walls, chimney and door out of cardboard.

3. Roll the dough out on a large, ungreased baking sheet and place the patterns on the dough. Mark off the various pieces with a knife, but leave the pieces in place.

4. [I rolled out the dough on a floured bench, roughly 1/8 inch thick (which allows for fact that the dough puffs a little when baked), cut required shapes and transferred these to the baking sheet. Any scraps I saved and rerolled at the end.]

5. Preheat the oven to 375'F (190'C). Bake for 12 to 15 minutes until the cookie dough feels firm. After baking, again place the pattern on top of the gingerbread and trim the shapes, cutting the edges with a straight-edged knife. Leave to cool on the baking sheet.

Simple Syrup: I skipped this part and glued it all together using the icing
2 cups (400g) sugar

Place in a small saucepan and heat until just boiling and the sugar dissolves. Dredge or brush the edges of the pieces to glue them together. If the syrup crystallizes, remake it.

Royal Icing:

1 large egg white
3 cups (330g) powdered sugar
1 teaspoon white vinegar
1 teaspoon almond extract

Beat all ingredients until smooth, adding the powdered sugar gradually to get the desired consistency. Pipe on pieces and allow to dry before assembling. If you aren't using it all at once you can keep it in a small bowl, loosely covered with a damp towel for a few hours until ready to use. You may have to beat it slightly to get it an even consistency if the top sets up a bit. Piped on the house, this will set up hard over time.


The December 2009 Daring Bakers’ challenge was brought to you by Anna of Very Small Anna and Y of Lemonpi. They chose to challenge Daring Bakers’ everywhere to bake and assemble a gingerbread house from scratch. They chose recipes from Good Housekeeping and from The Great Scandinavian Baking Book as the challenge recipes.

Sunday, 6 December 2009

Daring Bakers 20: Cannoli

Wow, it's been a while since I blogged, and a little over the due date for this DB entry but things have been rather busy blah de blah... but I'm here now with the latest Daring Bakers recipe - cannolis! The problem with my cannolis is that I don't have cannoli tubes so I ended up doing flat versions which turned out to be quite puffy....


..... but very tasty layered with whipped cream mixed with sliced strawberries, chopped pecan nuts and chocolate chips

The November 2009 Daring Bakers Challenge was chosen and hosted by Lisa Michele of Parsley, Sage, Desserts and Line Drives. She chose the Italian Pastry, Cannolo (Cannoli is plural), using the cookbooks Lidia’s Italian-American Kitchen by Lidia Matticchio Bastianich and The Sopranos Family Cookbook by Allen Rucker; recipes by Michelle Scicolone, as ingredient/direction guides. She added her own modifications/changes, so the recipe is not 100% verbatim from either book.


CANNOLI SHELLS

Ingredients

2 cups (250 grams/16 ounces) all-purpose flour
2 tablespoons(28 grams/1 ounce) sugar
1 teaspoon (5 grams/0.06 ounces) unsweetened baking cocoa powder
1/2 teaspoon (1.15 grams/0.04 ounces) ground cinnamon
1/2 teaspoon (approx. 3 grams/0.11 ounces) salt
3 tablespoons (42 grams/1.5 ounces) vegetable or olive oil
1 teaspoon (5 grams/0.18 ounces) white wine vinegar
Approximately 1/2 cup (approx. 59 grams/approx. 4 fluid ounces/approx. 125 ml) sweet Marsala or any white or red wine you have on hand
1 large egg, separated (you will need the egg white but not the yolk)
Vegetable or any neutral oil for frying – about 2 quarts (8 cups/approx. 2 litres)
1/2 cup (approx. 62 grams/2 ounces) toasted, chopped pistachio nuts, mini chocolate chips/grated chocolate and/or candied or plain zests, fruits etc.. for garnish
Confectioners' sugar

Note - If you want a chocolate cannoli dough, substitute a few tablespoons of the flour (about 25%) with a few tablespoons of dark, unsweetened cocoa powder (Dutch process) and a little more wine until you have a workable dough (Thanks to Audax).

DIRECTIONS FOR SHELLS:
1. In the bowl of an electric stand mixer or food processor, combine the flour, sugar, cocoa, cinnamon, and salt. Stir in the oil, vinegar, and enough of the wine to make a soft dough. Turn the dough out onto a lightly floured surface and knead until smooth and well blended, about 2 minutes. Shape the dough into a ball. Cover with plastic wrap and let rest in the fridge from 2 hours to overnight.

2 Cut the dough into two pieces. Keep the remaining dough covered while you work. Lightly flour a large cutting or pastry board and roll the dough until super thin, about 1/16 to 1/8” thick (An area of about 13 inches by 18 inches should give you that). Cut out 3 to 5-inch circles (3-inch – small/medium; 4-inch – medium/large; 5-inch;- large. Your choice). Roll the cut out circle into an oval, rolling it larger and thinner if it’s shrunk a little.

3 Oil the outside of the cannoli tubes (You only have to do this once, as the oil from the deep fry will keep them well, uhh, oiled..lol). Roll a dough oval from the long side (If square, position like a diamond, and place tube/form on the corner closest to you, then roll) around each tube/form and dab a little egg white on the dough where the edges overlap. (Avoid getting egg white on the tube, or the pastry will stick to it.) Press well to seal. Set aside to let the egg white seal dry a little.

4. In a deep heavy saucepan, pour enough oil to reach a depth of 3 inches, or if using an electric deep-fryer, follow the manufacturer's directions. Heat the oil to 375°F (190 °C) on a deep fry thermometer, or until a small piece of the dough or bread cube placed in the oil sizzles and browns in 1 minute. Have ready a tray or sheet pan lined with paper towels or paper bags.

5. Carefully lower a few of the cannoli tubes into the hot oil. Do not crowd the pan. Fry the shells until golden, about 2 minutes, turning them so that they brown evenly.

8. Lift a cannoli tube with a wire skimmer or large slotted spoon, out of the oil. Using tongs, grasp the cannoli tube at one end. Very carefully remove the cannoli tube with the open sides straight up and down so that the oil flows back into the pan. Place the tube on paper towels or bags to drain. Repeat with the remaining tubes. While they are still hot, grasp the tubes with a potholder and pull the cannoli shells off the tubes with a pair of tongs, or with your hand protected by an oven mitt or towel. Let the shells cool completely on the paper towels. Place shells on cooling rack until ready to fill.

9. Repeat making and frying the shells with the remaining dough. If you are reusing the cannoli tubes, let them cool before wrapping them in the dough.


Cannoli shell preparation, cutting out the dough circles, sealing the dough around the form, frying the shells, finished shells ready to fill


For stacked cannoli:
1. Heat 2-inches of oil in a saucepan or deep sauté pan, to 350-375°F (176 - 190 °C).

2. Cut out desired shapes with cutters or a sharp knife. Deep fry until golden brown and blistered on each side, about 1 – 2 minutes. Remove from oil with wire skimmer or large slotted spoon, then place on paper towels or bags until dry and grease free. If they balloon up in the hot oil, dock them lightly prior to frying. Place on cooling rack until ready to stack with filling.

Monday, 27 July 2009

Sticky Toffee Pudding

I had a craving yesterday as I was making a roast dinner for some pudding so I had a look through the crazy amount of recipes I have bookmarked online and came across Sticky Toffee Pudding by The Daily Spud (one very talented blogger who beat me to win the much coveted Irish Blog Award for the Best Food/Drink Blog in 2009!). I had all the ingredients to had/good substitutes for ones I didn't have so I had to make it!

However I was struck instantly with a problem - in fact a problem with pretty much every sticky toffee pudding recipe in the world! ........ Rob doesn't like dates, no scrub that, Rob doesn't like fruit, but occasionally likes raisins if they're in the right dish so I figured I would use raisins instead of dates. Then remembered a time when we had sticky toffee pudding before and there was fruit in it which he didn't like, drastic measures needed to be taken, I was determined to make this pudding! So out came the blender and I puréed the raisins into a paste and used as an alternative to dates - rather successfully because he didn't even notice! Score!!!!!!!!

The other substitution I made in this recipe was dark brown sugar for the muscovado sugar which worked fine too.

The result - one very tasty, quick and easy pudding! Thanks Spud!!!!!
Not the best photo in the world but it sure is one tasty pud!


Sticky Toffee Pudding

Serves 8

Ingredients

For the cakey bit:
200g plain flour
1 tsp baking powder
0.5 tsp salt
150g pitted dates puréed raisins
250ml water
2 tblsp golden syrup
1 tsp bicarbonate of soda
75g unsalted butter
125g light muscovado sugar dark brown sugar
2 eggs
1 tsp vanilla extract


For the sauce bit:
125g dark mucovado sugar dark brown sugar
125g unsalted butter
180ml double cream
pinch of salt
50 ml kahlúa (optional but lovely)

You’ll also need:
Baking tin - Daily Spud used 26cm x 18cm x 3cm. I halved the recipe and used 12cm diameter x 5cm depth

Recipe
1. Preheat the oven to 180C and grease the baking tin.
2. Whisk the flour, baking powder and salt together and set to the side.
3. Bring the raisins and water to a boil over a medium-high heat, then reduce the heat and simmer for 5 minutes.
4. Remove from the heat and add the golden syrup. Stir well to combine.
5. Add the bicarbonate of soda - the mixture will froth up.
6. Cream the butter until light and fluffy, then add the light muscovado sugar dark brown sugar and cream together until light and fluffy.
7. Add the eggs one at a time and beat well to combine, then stir in the vanilla.
8. Add half the flour and mix to combine.
9. Add the date raisin mixture in 2 lots, stir to combine and finally mix in the rest of the flour until just combined.
10. Scrape the mixture into the tin and bake for about 25 minutes or until a toothpick inserted into the centre comes out fairly clean.
11. To make the sauce, melt the butter and sugar together in a small saucepan over a medium heat, stirring often as the butter melts and the sugar dissolves.
12. Add the cream and (if using) kahlua, bring to a boil, reduce the heat and simmer for about 5 minutes, stirring continuously and allowing the sauce to reduce and thicken.
13. Serve warm slices of the pudding, spooned over with the warm toffee sauce.

Saturday, 27 June 2009

Daring Bakers 16: Bakewell Tart

The June Daring Bakers' challenge was hosted by Jasmine of Confessions of a Cardamom Addict and Annemarie of Ambrosia and Nectar. They chose a Traditional (UK) Bakewell Tart... er... pudding that was inspired by a rich baking history dating back to the 1800's in England.

Yum yum yum yum yummmmmmmmmm this was a delicious challenge! I love bakewell tart but never made one so I was rather excited. However I had a problem and do most months with the challenge because there's usually an element of "play with the flavours" and in the past I just ended up going with the flavours in the original recipe but I wanted to do something different this time so I went and stood in the jams and conserves for at least half an hour taking in all the various types and struggling to decide which one to get. 'Strawberry..... Lemon...... Blackberry..... Plum..... Raspberry...... Orange...... Rhubarb...... Apricot, mmmmm yes apricot, and I could throw in some peaches, ooooh yes, let's do that!' So it became a Peach and Apricot Bakewell Tart!

I had another problem though. I put it in to bake I went upstairs to make some phone calls and took my egg timer with me but forgot to go take the tart out of the oven when the buzzer went during my phone call so when I did go down it ended up looking like this.....


.... oops. So I ended up carving the carcinogen off....


..... and tucking in!


A yummy tart/pudding. I'm sure I'll do this again.

Peach and Apricot Bakewell Tart

Sweet shortcrust pastry


Prep time: 15-20 minutes
Resting time: 30 minutes (minimum)
Equipment needed: bowls, box grater, cling film

225g (8oz) all purpose flour
30g (1oz) sugar
2.5ml (½ tsp) salt
110g (4oz) unsalted butter, cold (frozen is better)
2 (2) egg yolks
2.5ml (½ tsp) almond extract (optional) (I used vanilla extract)
15-30ml (1-2 Tbsp) cold water

Sift together flour, sugar and salt. Grate butter into the flour mixture, using the large hole-side of a box grater. Using your finger tips only, and working very quickly, rub the fat into the flour until the mixture resembles bread crumbs. Set aside.

Lightly beat the egg yolks with the almond extract (if using) and quickly mix into the flour mixture. Keep mixing while dribbling in the water, only adding enough to form a cohesive and slightly sticky dough.

Form the dough into a disc, wrap in cling and refrigerate for at least 30 minutes (leave no longer than one day)

Place the chilled dough disc on a lightly floured surface. If it's overly cold, you will need to let it become acclimatised for about 15 minutes before you roll it out. Flour the rolling pin and roll the pastry to 5mm (1/4”) thickness, by rolling in one direction only (start from the centre and roll away from you), and turning the disc a quarter turn after each roll. When the pastry is to the desired size and thickness, transfer it to the tart pan, press in and trim the excess dough. Patch any holes, fissures or tears with trimmed bits. Chill in the freezer for 15 minutes.

Frangipane

Prep time: 10-15 minutes
Equipment needed: bowls, hand mixer, rubber spatula

125g (4.5oz) unsalted butter, softened
125g (4.5oz) icing sugar
3 (3) eggs
2.5ml (½ tsp) almond extract (I used vanilla extract)
125g (4.5oz) ground almonds (I used 100g)
30g (1oz) all purpose flour (I used 55g)

Cream butter and sugar together for about a minute or until the mixture is primrose in colour and very fluffy.
Scrape down the side of the bowl and add the eggs, one at a time, beating well after each addition. The batter may appear to curdle. In the words of Douglas Adams: Don’t panic. Really. It’ll be fine.
After all three are in, pour in the almond extract and mix for about another 30 seconds and scrape down the sides again. With the beaters on, spoon in the ground nuts and the flour. Mix well. The mixture will be soft, keep its slightly curdled look (mostly from the almonds) and retain its pallid yellow colour.

Assembling the tart

One quantity sweet shortcrust pastry
Bench flour
250ml (1cup (8 US fl. oz)) jam or curd, warmed for spreadability
One quantity frangipane
One handful blanched, flaked almonds (I left this out)

Preheat oven to 200C/400F.

Remove shell from freezer, spread as even a layer as you can of jam onto the pastry base (I added a layer of peach slices over the top of my apricot jam layer)


Top with frangipane, spreading to cover the entire surface of the tart. Smooth the top and pop into the oven for 30 minutes. Five minutes before the tart is done, the top will be poofy and brownish. Remove from oven and strew flaked almonds on top and return to the heat for the last five minutes of baking.

The finished tart will have a golden crust and the frangipane will be tanned, poofy and a bit spongy-looking. Remove from the oven and cool on the counter. Serve warm, with crème fraîche, whipped cream or custard sauce if you wish.

When you slice into the tart, the almond paste will be firm, but slightly squidgy and the crust should be crisp but not tough.

Thursday, 28 May 2009

Taste and Create: Orange Cake

I'm slightly late in posting this (and like a million other things!!!!!!!) but life has been rather busy the last few months and I've not had time for blogging, but have been baking and cooking when I get the chance.

So this is my post for this month's Taste and Create hosted this month by Min and Shell at The Bad Girls' Kitchen.

I was paired with Tasty Treats by Poornima - a blog I hadn't come across and one I enjoyed having a sift through deciding what to make. I love orange flavours at the minute and I love baking so I had to make this....

Orange Cake
Source: Tasty Treats

Ingredients

1 cup sugar
4 eggs
3/4 cup oil
1/4 cup orange juice
1 tsp lemon juice
1/2 tsp orange essence (you could add a few drops more according to your taste)
a little orange colour
1 1/2 cups all purpose flour
1 tsp baking powder
Candied orange peel
Chopped mixed nuts for topping
Orange Flavoured Chocolate shavings (My addition to the recipe(


Recipe
Grease and line a 9"x5" loaf tin bundt tin.
Preheat the oven to 350F/ 180C.
Sieve the flour and baking powder together and keep aside.
Beat the eggs and sugar together in a for 5mins on high.
Add the oil, orange and lemon juice, essence and colour and beat for about 2mins till well combined.
Add the flour mixture and beat on low speed just until combined.
Spread the chocolate shavings and some candied peel around the tin
Pour the batter into the prepared pan.
Bake for 25mins or til done.
Unmould and cool on a wire rack.

Friday, 10 April 2009

Rainbow Cake from Scratch.

I'm often unsure whether or not to be complimented when you serve something and people ask "where did you buy this from?" which has happened at least 5 times recently. Do you take it positively because they think what you've offered is so good they think it has to be done by a professional? Or do you take it as an insult because the person doesn't think you're capable of making something so nice?

Either way, I was asked this about this cake when I remade it for youth group, but most of them were just in awe of the colours.

I decided to redo this recipe only without the boxed cake and icing mixes, so here's a "from scratch" version for you - and it's just as fun the second time making this. I was also in shock at how many comments and links and emails I got about the Rainbow Cake I made for Taste and Create I just felt I needed to do it again.


Rainbow Cake from Scratch

Ingredients

175g butter or margarine
175g caster sugar
3 eggs
250g self raising flour
little milk (optional)

Butter Icing
75g butter or margarine
225 g icing sugar, sieved
2 tbsp milk
food colouring (optional)
sweets/hundreds and thousands to decorate (optional)

Recipe
1. Preheat oven to 180˚C and grease two 17cm cake tins
2. Beat the butter and sugar together until light and creamy.
3. Mix in eggs one at a time, then fold in the flour. If the mixture seems dry add a little milk.
4. Split the batter into 6 and add the different food colourings.
5. Pour half of the first batter into each tin in the centre and tap it out to spread. Repeat with every other colour.
4. Bake for 25 minutes until form to touch and golden.

5. To prepare the icing, beat all the ingredients together until fluffy and light.
6. Leave the cake to cool on a wire rack, then ice and decorate.

Saturday, 4 April 2009

Post 300! Chocolate puddings


(Photo by Shawn Cunning)

This is my 300th post!!! Isn't that mad? I need to mark the occasion with something special and what better than chocolate right?

This is another recipe from Nigella Express. You know the more I make from this book the more I want to make from it because everything I've made from it has been delicious so far!

I've made these chocolate puddings a few times now and love them more and more each time. The spongy chocolate, the gooey chocolate sauce and then the honeycomb on top to finish it off - perfect!


"Glitzy" Chocolate Puddings
Source: Nigella Express by Nigella Lawson, p221
Serves 8

Ingredients
PUDDINGS

100g dark chocolate (70%) (I used 50%)
100g soft unsalted butter
200g sugar
4 large eggs
50g plain flour
1/4 tsp bicarbonate of soda
pinch of salt
GLAZE
150g dark chocolate (70%) (Again I used 50%)
45g unsalted butter
2 "Crunchie" chocolate bars or honeycomb broken up into crumbs

Recipe
1. Preheat oven to 180˚C.
2. Break up 100g chocolate and place in a bowl with the 100g butter. Melt together either in a microwave or double boiler. Once melted, leave to cool a little.
3. In a separate bowl, beat together the eggs and sugar until thick, moussy and pale. Then fold in the flour, soda and salt.
4. Gently fold in the slightly cooled chocolate, then divide the mix between 8 ramekins. Bake in the oven for 25 minutes.
5. Prepare the glaze by melting to chocolate and butter together and whisk to make a glossy mixture for spooning over the puddings, then top them with some crunchie.

Tuesday, 31 March 2009

Taste and Create: Rainbow Cake

It's Taste and Create time again. This month I was paired up with Tara from Eat, Be and See who is a woman after my own heart being a Harry Potter Fan and by having this cake on her blog that I have made for this month.

Rainbow Cake!!!! Check out Tara's (on her funky Harry Potter plate -


How could you not be excited by that?

So the recipe calls for a box of cake mix. I haven't used cake mix in ages and ages so I'm in the shop trying to figure out what might be best and I forget that plan when I spot that the Barbie cupcake mix includes pink frosting and a strawberry decorating tube so just have to buy that!!!!! It makes 12 small cupcakes worth of batter but that's fine because it'll only be me eating this cake anyways.

I loved this challenge, the smells of the cake mix reminded me of birthday parties when I was little and the white icing mix turning pink entertained me

Rainbow Cake
Source: Eat, Be and See

Ingredients

1 box of Green's Barbie cupcake mix
A mix of food colourings

Recipe
1. Make up cake mix according to packet instructions and split into 6.
2. Mix in the colourings to the 6 cake mixes.


3. Pour the batter into the centre of your greased cake tin one colour at a time.


4. Bake according to packet instructions - however mine had to bake a little longer because I obviously didn't make the Barbie cupcakes.


A slightly thin cake but good seeing as only I will be eating it.

5. Make icing according to packet instructions.


6. Decorate cake.


7. Slice in and taste the rainbow.

Monday, 23 March 2009

Monthly Triplet: Raspberry cottage cheese cake

This is the third part of February's monthly triplet of recipes from magazines and next week I'll get into March's triplet.

I was caught by the photo of this recipe in the magazine, it was a blueberry cottage cheese cake but I had a bag of frozen raspberries I was dying to use so I subbed out the blueberries, but I think I may just try this sometime with blueberry because it was a great cake and fun to make. I also halved the recipe and baked in a sandwich tin instead of the 9.5" tin. I think this would be perfect with some afternoon tea sitting out in the beautiful sunshine we've been having here over the past week.


Heres the recipe using my halved measurements

Raspberry cottage cheese cake
Source: Easy Food magazine February 2009, p65

Ingredients

butter, for greasing
2 eggs, separated
70 g brown sugar
125g cottage cheese, beaten until smooth
75g plain flour
1 tsp baking powder
pinch of salt
100g semolina
1/2 tsp lemon rind
2-3 handfuls of frozen raspberries
2 tbsp caster sugar
25g flaked almonds (I thought I had some when I started making this but it turns out I didn't)

Recipe
1. Preheat oven to 180˚C and grease your cake tin.
2. Whisk the egg yolks in a bowl, add the sugar and whisk until the mixture is light and creamy.
3. Mix in the cottage cheese.
4. Sieve the flour, baking powder and salt into a bowl then stir into the cheese mixture. Fold the semolina and lemon rind in.
5. Whisk the egg whites in a separate bowl until stiff, then fold into the cake mixture.
6. Pour the mixture into the prepared tin and sprinkle the raspberries over the top along with the caster sugar and almond flakes.
7. Bake in the oven for 1 hour (because mine was smaller it took 40 minutes)


I twittered about how I've been blogging too much cake lately and worried that you all think I ONLY eat cake so I'm going to blog a few non cakey things this week to try and convince you!